MongoDB in 10' : Fill with python, Read with pandas
Set up your first MongoDB server, store data with python, and analyze it with pandas in a jupyter notebook.
Introduction
If you're working with data, chances are you absolutely need a database. In this post, you'll learn how to:
- set up a local MondoDB database server
- create a database and fill it with data
- read this data from a jupyter notebook for analysis with pandas
You could object that you actually don't need a database, because you're storing data into files, or because you're processing a data stream online.
Fair enough. But at some point, you will lose track of all your files, not being able to remember under which conditions a file had been created.
Or, if you process a data stream, what happens if your analysis code crashes for some reason? you probably want to be able to recover later on. And what if you or your customer wants to see what happened in the past, during a given period of time?
Another objection is that setting up and maintaining a server is complicated, and that you would need to learn SQL...

But hey, this is 2019. Servers can be deployed at the push of a button, and NoSQL databases like MongoDB are easy to use and powerful.
So set your countdown to 10 minutes, and let's get started!
Why MongoDB?
You can think of a database as an excel table. The set of columns is the schema of the database, and the records are the rows.
MongoDB is a NoSQL database system. As far as we are concerned in this post, this simply means that the database has no predefined schema. If you have data to store, you just store it as it is.
On the contrary, in an SQL database, you need to restructure your data to make it fit the schema. And before even being able to store anything, you need to dedicate a good amount of time designing the right schema.
Data scientists, for the most part, are no database experts. Certainly, I'm not! But I set up and use a lot of databases. Sometimes, it's just for a quick and dirty project, and sometimes, I later need to scale the database to fairly big data.
MongoDB is quick, easy, and it scales.
MongoDB Installation
To install MongoDB, just refer to the official instructions:
I only tested the macOS installation, which I repeat here.
First, install homebrew if you don't already have it. Then:
brew tap mongodb/brew
brew install mongodb-community@4.0
After installation, you can start the server and make sure it restarts after reboot by doing:
brew services start mongodb-community@4.0
Creating your first database
MongoDB comes with a command line shell that you can use to create databases, fill them, and query them. Let's use it:
mongo
In the mongo shell, switch to a database named test. Note that the database will not be created until you store a first document (a record):
> use test
switched to db test
Create a collection in this database and store a first entry:
> db.test1.insert({firstname:'oscar', surname:'peterson'})
WriteResult({ "nInserted" : 1 })
And another one:
> db.test1.insert({map:{'x':1, y:[0,1,2]}, name:'a_map'})
WriteResult({ "nInserted" : 1 })
As you can see, the second document has nothing to do with the first one. But no problem, mongo easily digests it. And even though one of the fields contains hierarchical data!
Now let's retrieve all entries
> db.test1.find()
{ "_id" : ObjectId("5ce54ef809fcaa334f64fad9"), "firstname" : "oscar", "surname" : "peterson" }
{ "_id" : ObjectId("5ce54efd09fcaa334f64fada"), "map" : { "x" : 1, "y" : [ 0, 1, 2 ] }, "name" : "a_map" }
Obviously, if we then query the database, only the relevant records are returned:
> db.test1.find({firstname:'oscar'})
{ "_id" : ObjectId("5ce54ef809fcaa334f64fad9"), "firstname" : "oscar", "surname" : "peterson" }
Cool, but this is a python blog, and we are certainly not going to to use the mongo shell to fill our database.
Installation of the python mongoDB client
We will use pymongo to interact with our mongoDB database in python. As usual, we will install our data science python tools with Anaconda , because that's the easiest way to go.
Open a terminal, and create a new anaconda environment, with all the packages that we will need:
conda create -n mongo python=3.6 pymongo pandas matplotlib jupyter
pandas, matplotlib, and jupyter are only necessary to analyze the data later on. If you're only interested in talking to the database, you can drop them.
Then, activate this environment as instructed:
conda activate mongo
And finally make sure that pymongo can be used:
python -c 'import pymongo; print(pymongo.__version__)'
3.7.2
Filling mongoDB from python
Here is a little script I have prepared for you. This script connects to the database and creates a new table to store 100 points on a sine wave.
mongo_write.py:
import pymongo
import math

# define the client, the database, and the collection
# the database and the collection are created at first insert
# if needed
client = pymongo.MongoClient('localhost',27017)
mydb = client["test"]
sinfun = mydb["sin"]

print('insert')
data = []
for i in range(100):
    x = i/10.
    y = math.sin(x)
    data.append({'x':x,'y':y})
# the list of records is written to the database in one go:
sinfun.insert_many(data)
print('done')
Run the python script:
python mongo_write.py
And test in the mongo shell that the collection exists and that the data has been filled correctly:
mongo
> use test
> db.sin.find().limit(5)
{ "_id" : ObjectId("5ce5512f4b8cf21178dd3ecc"), "x" : 0, "y" : 0 }
{ "_id" : ObjectId("5ce5512f4b8cf21178dd3ecd"), "x" : 0.1, "y" : 0.09983341664682815 }
{ "_id" : ObjectId("5ce5512f4b8cf21178dd3ece"), "x" : 0.2, "y" : 0.19866933079506122 }
{ "_id" : ObjectId("5ce5512f4b8cf21178dd3ecf"), "x" : 0.3, "y" : 0.29552020666133955 }
{ "_id" : ObjectId("5ce5512f4b8cf21178dd3ed0"), "x" : 0.4, "y" : 0.3894183423086505 }
Plotting mongoDB data with pandas
We are now going to access and plot our data in a jupyter notebook. First start the jupyter notebook server,
jupyter notebook
and then create a new python 3 notebook, and follow the instructions below.
Connect to the mongodb server on local host, and get the sinfun collection of the test database.
import pymongo
client = pymongo.MongoClient('localhost')
sinfun = client.test.sin
sinfun.find_one()
Get all documents from the database. Cursor is an interator, and we create a list from it. Note that after the iteration is done, the iterator is exhausted. If you want to reuse it, you'll have to do a find again.
import pandas as pd
cursor = sinfun.find()
entries = list(cursor)
entries[:5]
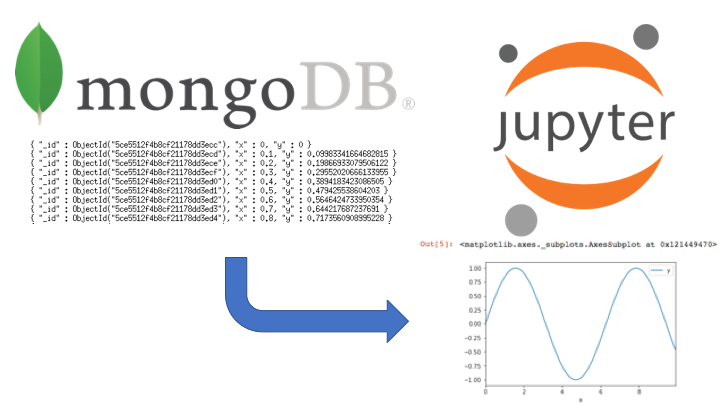
Finally, we create a pandas dataframe from this list for easy plotting:
df = pd.DataFrame(entries)
df.head()
df.plot('x')

Conclusion
In this post, you have learnt that you can set up a mongoDB server very quickly, and that mongoDB is a breeze!
You have also seen how to connect to use the database from a python script, and from a jupyter notebook, in connection with pandas.
I wanted to stick to a simple example, and I'm sure that it will already be very useful to you. In future posts, we'll see how to access the server from a remote machine, and how to fill and read the database asynchronously, for an interactive display with bokeh.
Please let me know what you think in the comments! I’ll try and answer all questions.
And if you liked this article, you can subscribe to my mailing list to be notified of new posts (no more than one mail per week I promise.)
Learn about Data Science and Machine Learning!
You can join my mailing list for new posts and exclusive content: